![ExpensePoint White Logo.png]](https://support.expensepoint.com/hs-fs/hubfs/ExpensePoint%20Logos/ExpensePoint%20White%20Logo.png?height=40&name=ExpensePoint%20White%20Logo.png)
Steps to Rename a Receipt
-
Access the Receipt Wallet:
From the Expense navigation menu located at the bottom of the screen, select the Receipt Wallet module.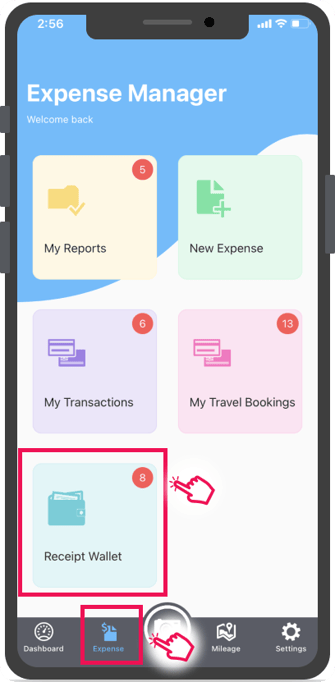
-
Enable Rename Mode:
Tap the hamburger menu in the Receipt Wallet and choose the Select option to activate the rename function.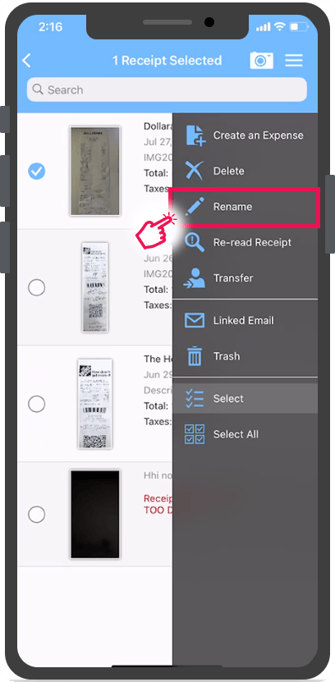
-
Alternative Method - Rename from Receipt Details:
Open the receipt you want to rename. On the Receipt Details screen, and tap the hamburger menu. Select the Rename option.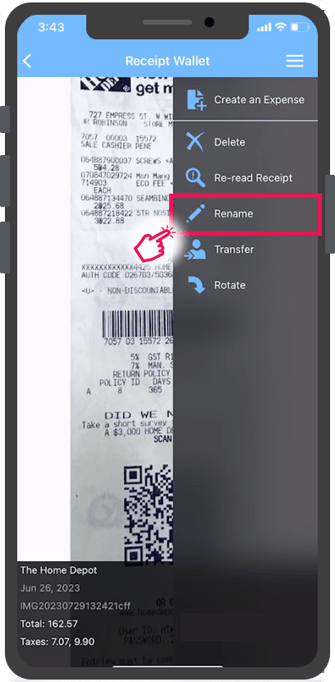
-
Rename Receipt:
The Rename window will appear, allowing you to edit the receipt’s name.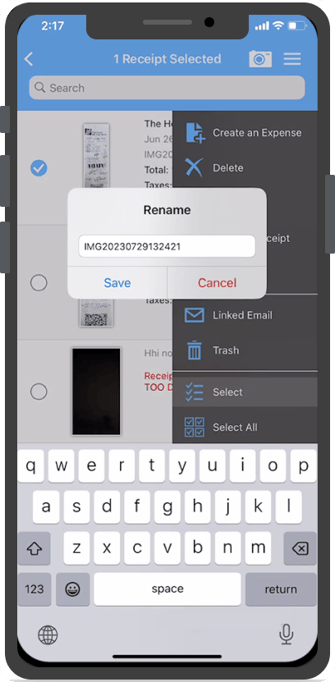
After making changes, tap Save to confirm or Cancel to discard.
For web browser or desktop application instructions, please refer to this article.